
Welcome Back!
In the previous blog we discussed about North-South packet walk in case of stretched network to 2 different physical locations, using NSX Federation.
Today, we are going to create a Global Policy and write a Deny rule under the same.
Topology used –
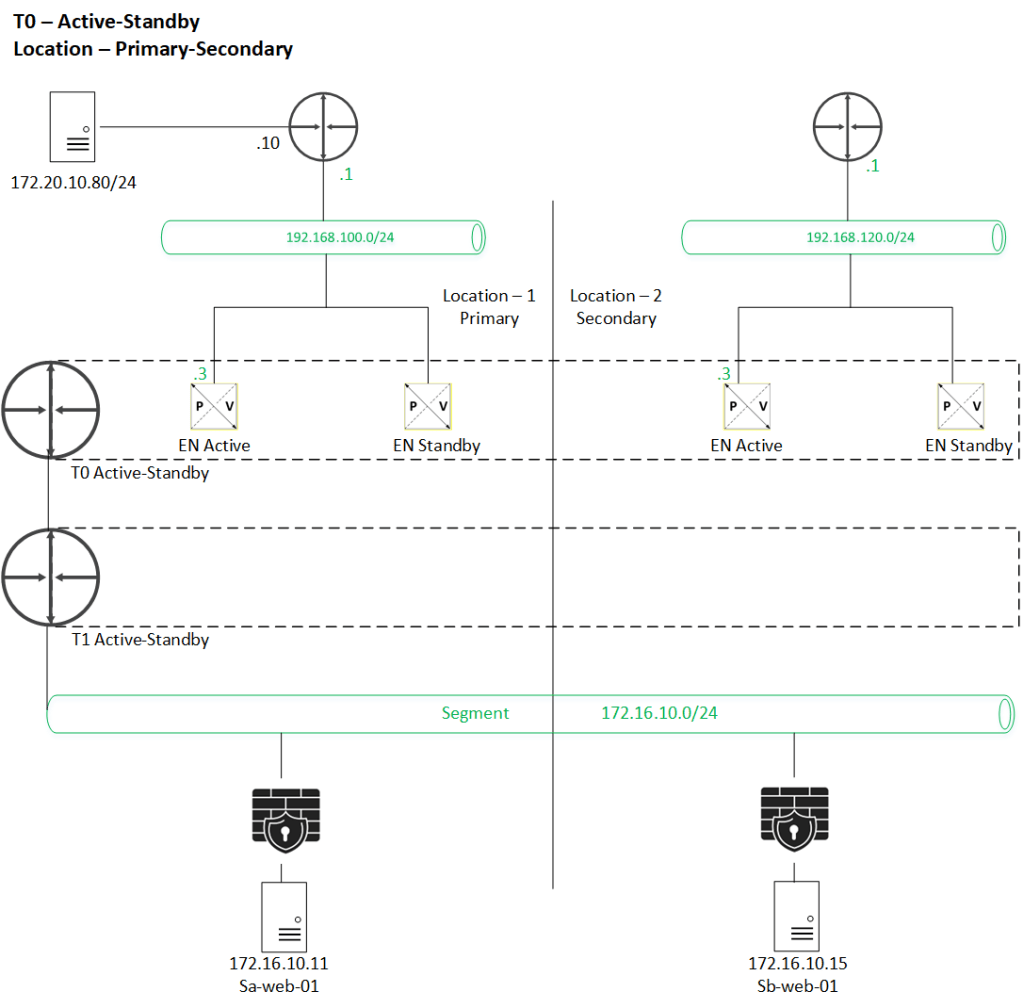
Use-Case – We are going to deny the existing HTTP communication between below source & Destination.
Source – 172.20.10.80
Destinations – 172.16.10.11 & 172.16.10.15
Task performed & discussed in this blog.
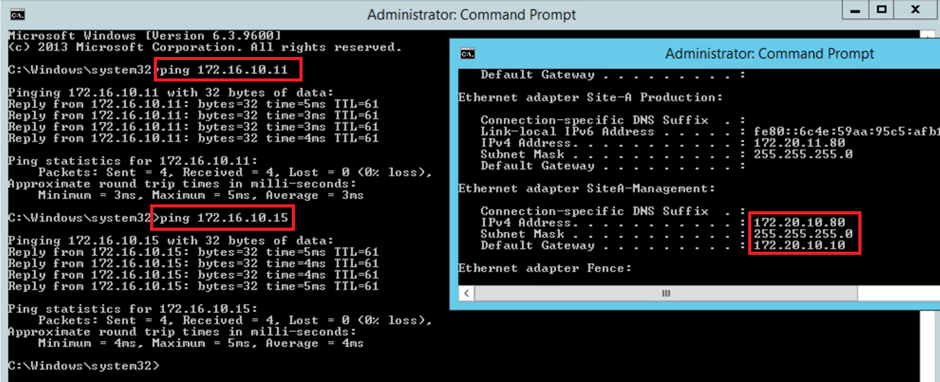
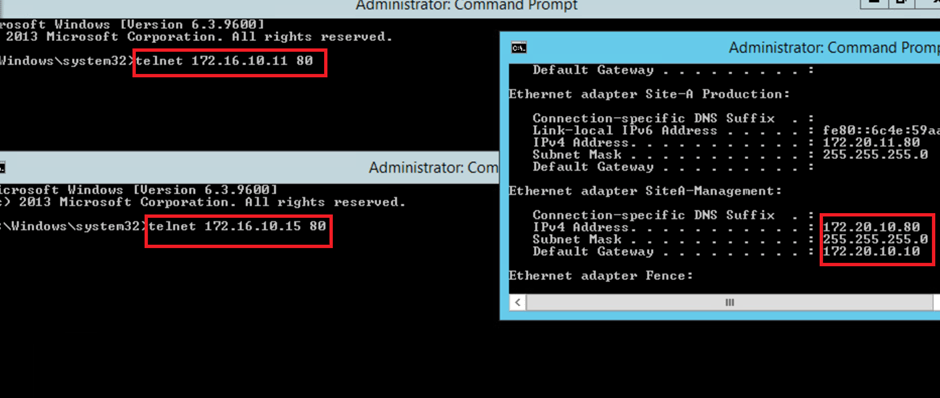
- Pre-Check: Validate existing Ping & HTTP connectivity for given Source & Target.
- Create global group.
- Configure global firewall policy & rule.
- Validate the rule data plane realization on ESXi which hosts VMs involved.
- Post-Check: Validate Ping & HTTP connectivity again & conclude.
==============================================================================================================
- Precheck – lets validate the existing communication for ICMP via Ping & HTTP via Telnet, which we can see is successful.

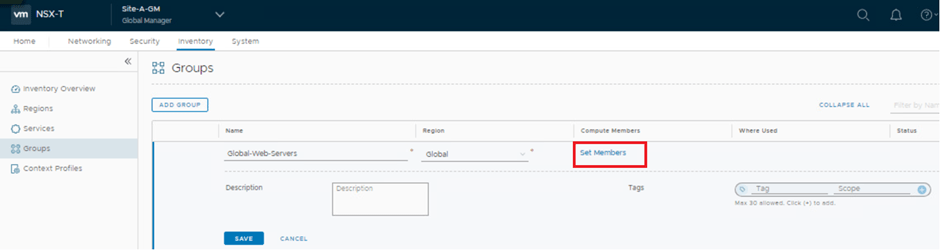
- Create global group , which can be used as source & destination filed :
GM UI > Inventory > Groups > Add group.
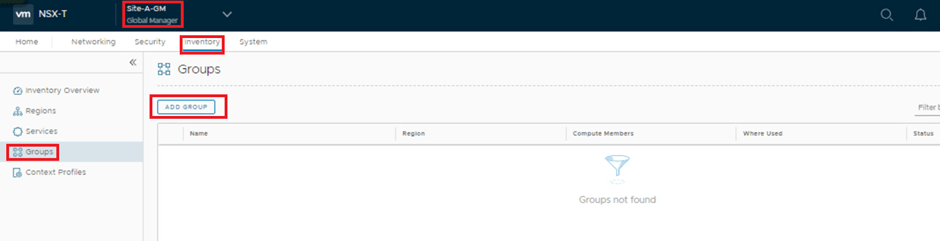
here we name a Security group & select region , which can be global , as well as site specific, this region field decides about the span of this group.
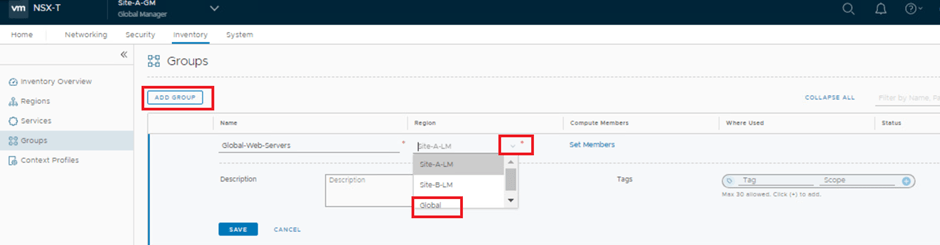
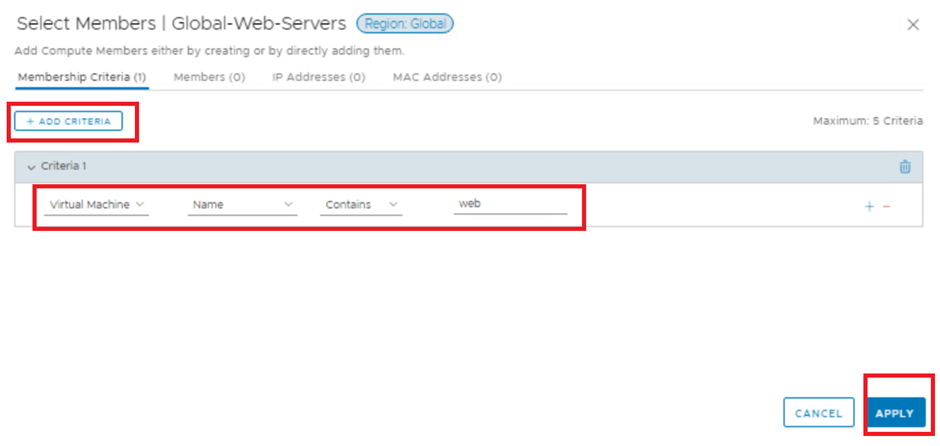
Member can be set statically as well as dynamically.
We are setting the dynamic criteria for our group “Global-web-servers” with condition : VM Name contains “web” keyword.
VM (existing or new ) having “web” keyword in their name, will be auto assigned to tis group.

we can see both of destination web VMs SA-web-01 & SB-web-01 are part of this group now.

- Configure global firewall policy & rule
GM UI > Security > Distributed firewall > Category specific rule > Add Policy
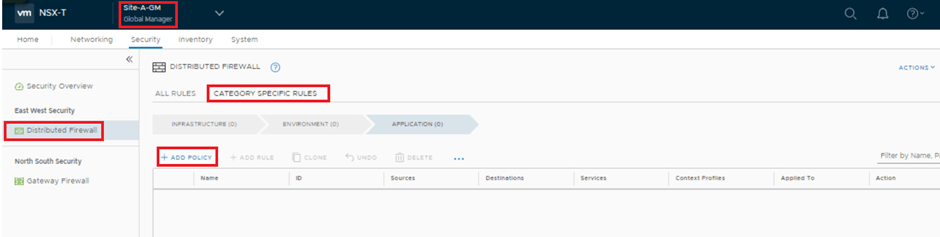

Write a block HTTP rule under “Global-external” policy.

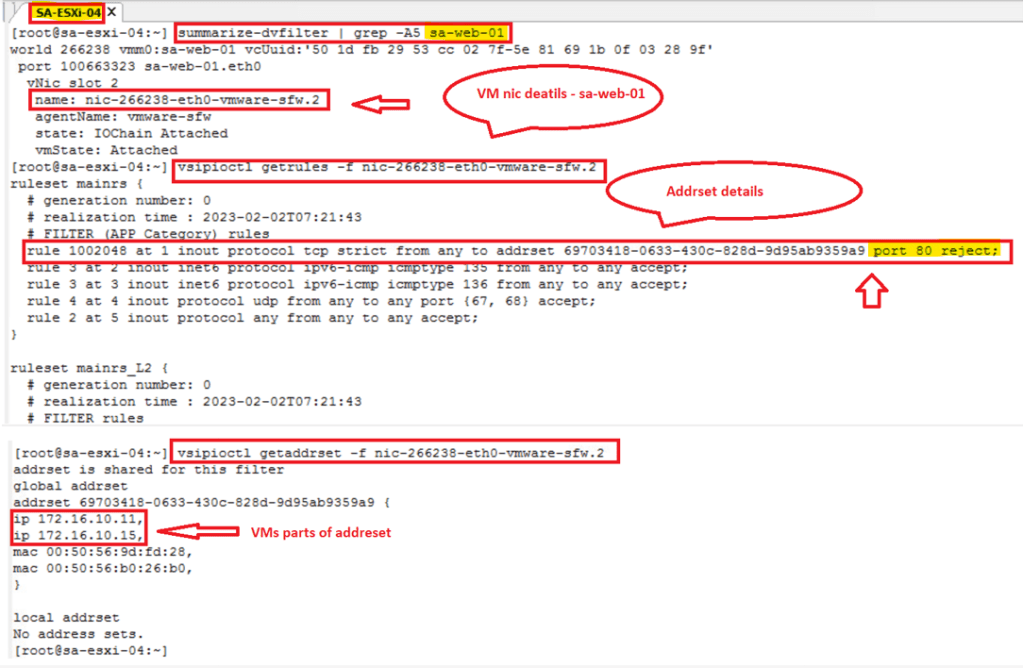
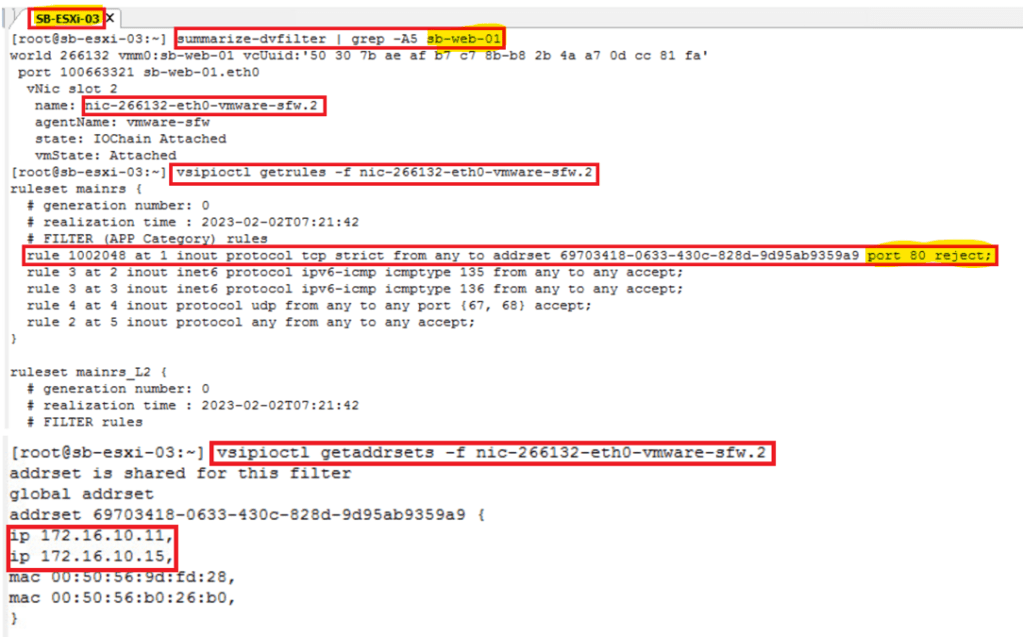
- Validate the rule data plane realization on ESXi which hosts VMs involved – Run below commands on the ESXi hosts which has Source & Target VM.
- summarize-dvfilter | grep -A5 “VM name”
- vsipioctl getrules -f “Nic involved”
- vsipioctl getaddrsets -f “Nic involved”
- Post Check – Validate the ICMP & HTTP again between same Source & Target.
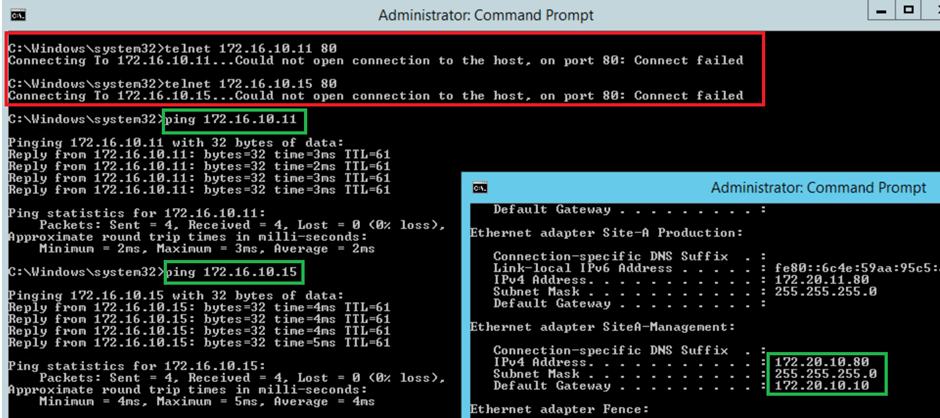
Conclusion – Since we have blocked only HTTP in our use case, port 80 is no longer getting a response via telnet, however ICMP still working.
This is it for today’s blog, will discuss any new topic/content in our upcoming blogs.
PS: Any Improvement points or suggestions are welcome.
—–Thank You—–
Prashant Pandey
