
Welcome Back!
In previous blog, we have discussed federation basics and key concepts, today will talk further, and see how we implement federation, like…
- Promoting a site/location as Active, standby.
- Adding On-Prem locations.
Considerations–
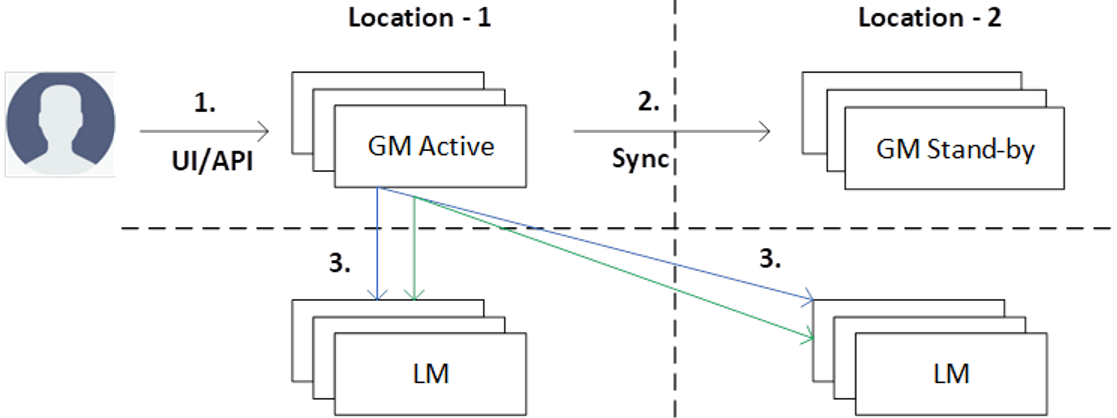
- We have 2 physical sites, we want location-1 as Active & location 2 Stand-by
- So, GM Active cluster will be part of location-1 & GM stand by cluster will be part of location-2, it is worth to note that LM cluster will always be in active state.
- Since we are going to discuss federation deployment steps, it makes sense that local sites / LMs are already present & GM cluster is also deployed at both sites.
Now we will discuss further and implement below points.
- Propose Site-1 / Location-1 GM as Active
- Propose Site-2 / Location-2 GM as Stand by
- Add On-Prem Site-1 / location-1 LM
- Add On-Prem Site-2 / location-2 LM
=======================================================
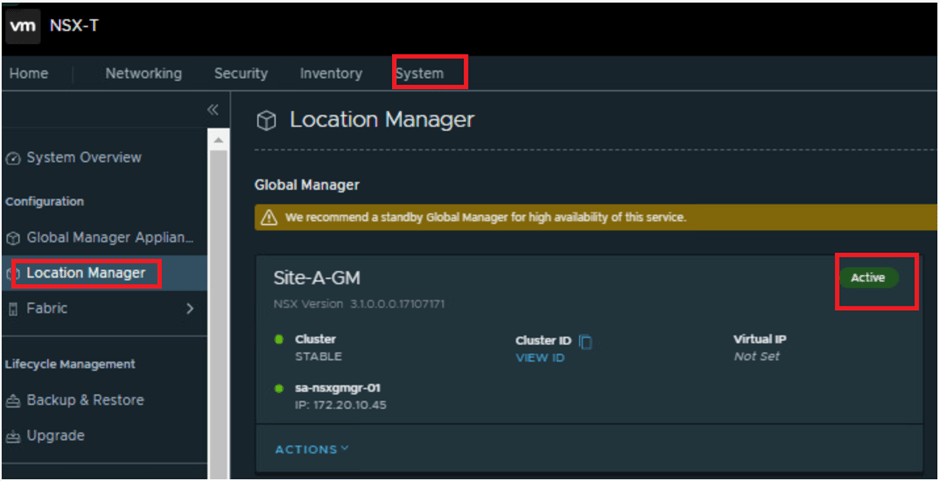
- Login to Primary site/ Active GM VIP.
Go to below path to propose site-1 as Active.
System > Location Manager > Make Active

It might take few mins to complete the action, once done we will see this site as Active.
You may ignore the warning to add standby GM for HA. (As we will be doing that in coming steps)
2. From the same Active GM VIP
System > Location Manager > Add Stand By
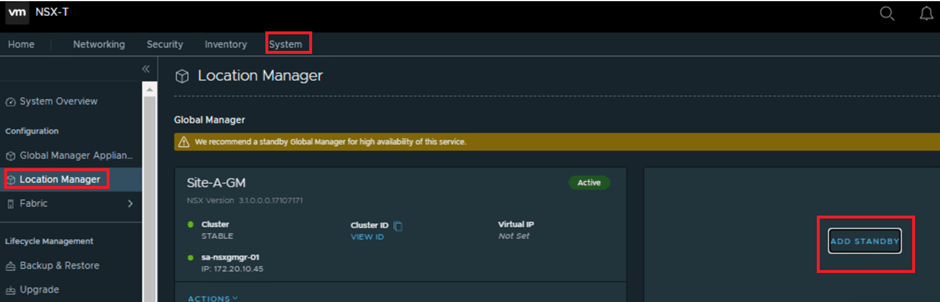
This is the step where we need to provide all details of standby GM, like…
Name, FQDN/IP, Credentials and most importantly Thumbprint.

To get the thumbprint:
- Login to NSX manager (in this case- secondary GM VIP)
- Run the command – get certificate api thumbprint
- Copy the thumbprint to make it handy
Use all above details & register location-2 as standby.

It might take few mins to complete the action, once done we will see this site as standby.

3. Add the ON-PREM Site-A
Go to below path to add Site-A
System > Fabric > Add On-Prem locations


To get the thumbprint:
- Login to NSX manager (in this case- LM-1 VIP)
- Run the command – get certificate api thumbprint
- Copy the thumbprint to make it handy
Use all above details & register LM-1.


You can ignore the Default transport zone not found for Local Manager at site Site-A-LM error, which will disappear after the Local Manager sync is complete with Global Manager.
The Site-A-LM takes 5 minutes to sync completely with Global Manager and turn the status to green.

4. Add the ON-PREM Site-B (Similar way add another location)
Go to below path to add Site-B
System > Fabric > Add On-Prem locations

To get the thumbprint:
- Login to NSX manager (in this case- LM-2 VIP)
- Run the command – get certificate api thumbprint
- Copy the thumbprint to make it handy
Use all above details & register LM-2.
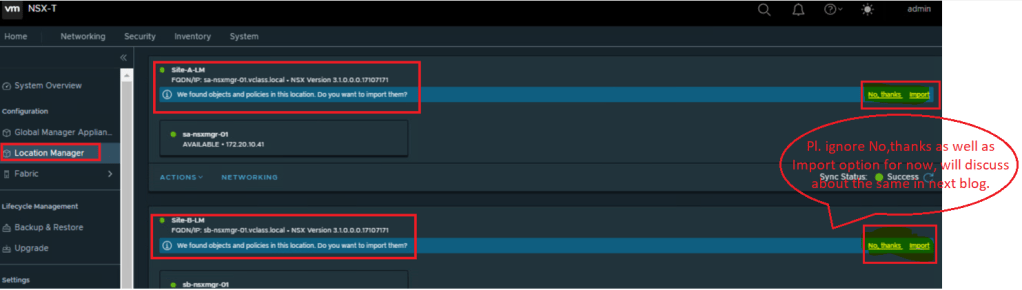
Once both locations are added, now we can see Site-A LM & Site-B LM via Active GM VIP only and we can switch to the same to configure any local configutaion as well.

This is it for today’s blog. We will be discussing about “Importing local objects to Global Manager” & “Remote Tunnel End-Points” in next blog.
PS: Any Improvement points or suggestions are welcome.
—–Thank You—–
Prashant Pandey
